Category Archives: Linux

Building an Oracle 26ai Database Server from Scratch #JoelKallmanDay

In 2014, while teaching Oracle Database Administration courses at Austin Community College, I wrote a series of blog posts on how to create an Oracle Database server: Oracle Database 12c on Oracle Linux 6, so my students could build their own practice database servers.

Now, as the Director of Consulting Services in the Oracle Technologies division of Talan, I was recognized as an Oracle ACE. Part of the ACE program is promoting Oracle at Conferences (I presented two sessions at ODTUG’s Kscope26 conference in Colorado this year) and doing things like blogging. Blogging helps me maintain my ACE status (although I’ll have more than enough points from presenting at conferences this year).

Since I’ve been a bit sporadic about blogging lately, I thought I’d get back into the swing of things by putting out my complete step-by-step instructions for building an Oracle Database server on your own machine. Note that these days, you no longer really have to do this. You can simply go to Oracle Cloud and obtain a pre-configured database server. If you just need “the database” and don’t want to do anything at the operating system level, then an Oracle Autonomous Database is for you. However, there are several limitations associated with an Autonomous Database (which is essentially a pluggable database within a database maintained by Oracle for you) that are completely removed if you opt for an Oracle Base Database instead. With an Oracle Base Database, you get direct access to the operating system, and you could, for example, potentially attempt to do all of the examples within Tom & Darl’s incredibly awesome book Expert Oracle Database Architecture. (One of my presentations at Kscope this year was basically “Read this book, do all the examples while understanding what’s happening, and you’ll be a much better Oracle Database developer.”) That said, messing around with an Oracle Base Database on Oracle Cloud could possibly get you into a state where the automated patching tools and other things that Oracle does for you might not work. If you are just playing around, you could always blow away the database and create a new one if you mess it up too much.

However, if you would like to build a practice database server from scratch on your own machine, and along the way, learn much more about how an Oracle Database server is built, then this series of blog posts is for you.

A note about my philosophy when it comes to Oracle Database servers and the rules I like to follow.

  1. Ease of understanding, especially during a crisis, is important
  2. Less configuration is, almost certainly, better configuration
  3. The more you understand how, and why, and where the Oracle database does its things, the better you can respond in an emergency situation

As an example, when I make my post about the systemd services that I create for Oracle backups, you’ll notice that the entirety of the RMAN backup configuration is entirely within the system command. This means that if there are changes to be made, I go to the one place where my backup is configured and just address changes there. The ‘traditional’ approach of a cron job (1) that calls a script (2) that calls RMAN (3) with another file for the RMAN commands (4) spreads “How are backups done?” all across your OS in different files in different directories.

As I get time, I’ll be adding posts for each of the items below (almost certainly in order as I do these steps on my own new Talan laptop) and linking them from here.

Building an Oracle 26ai Database Server

  1. Install Oracle VirtualBox & VirtualBox Extension Pack
  2. Download Oracle Linux ISO
  3. Create Linux Virtual Machine
  4. Log in as root & Improve Quality of Life
  5. Disable selinux
  6. Disable firewalld
  7. Update /etc/hosts
  8. Install Guest Additions Into Virtual Machine
  9. Install Oracle Linux 9 EPEL & Oracle Software Repos
  10. Install rlwrap
  11. Install Oracle Database Preinstall RPM
  12. Install Oracle JDK
  13. Install Nginx (optional)
  14. Set oracle OS user password
  15. Create Oracle directories
  16. Initial Oracle login and quality of life improvements
  17. Install autoupgrade
  18. Create autoupgrade download keystore
  19. Download Oracle Database with autoupgrade
  20. Download Oracle APEX with patch (if available)
  21. Download ORDS
  22. Create Oracle software home with autoupgrade
  23. Configure read only home (poorly named)
  24. Create Oracle container database with pluggable
  25. Create listener
  26. Install ORDS
  27. Install & Patch Oracle APEX
  28. Set APEX internal workspace password
  29. Enable APEX network services
  30. Create and enable an APEX resource manager plan
  31. Turn on database flashback
  32. Create systemd services for database and ORDS
  33. Create systemd backup service
  34. Configure APEX static images (CDN or local)
  35. Install mkcert for signed certificates
  36. Configure Nginx
  37. Disable annoying password stuff in APEX

A note about the Joel Kallman Day tag on this post:

Joel was a really nice person who dedicated his life to being a good and kind person. He did so much for the Oracle APEX community and for his family. Those of us who knew him still really miss him.

My last correspondence with Joel was this:

                Got a few minutes to chat? Trying to help a CIO find a good APEX hire? - me
                          
Sorry, on medical leave. - Joel

                No problem at all. Sorry, I didn't know. Here's to a speedy recovery! - me                          

That speedy recovery never came, and the world is at a loss because of it.
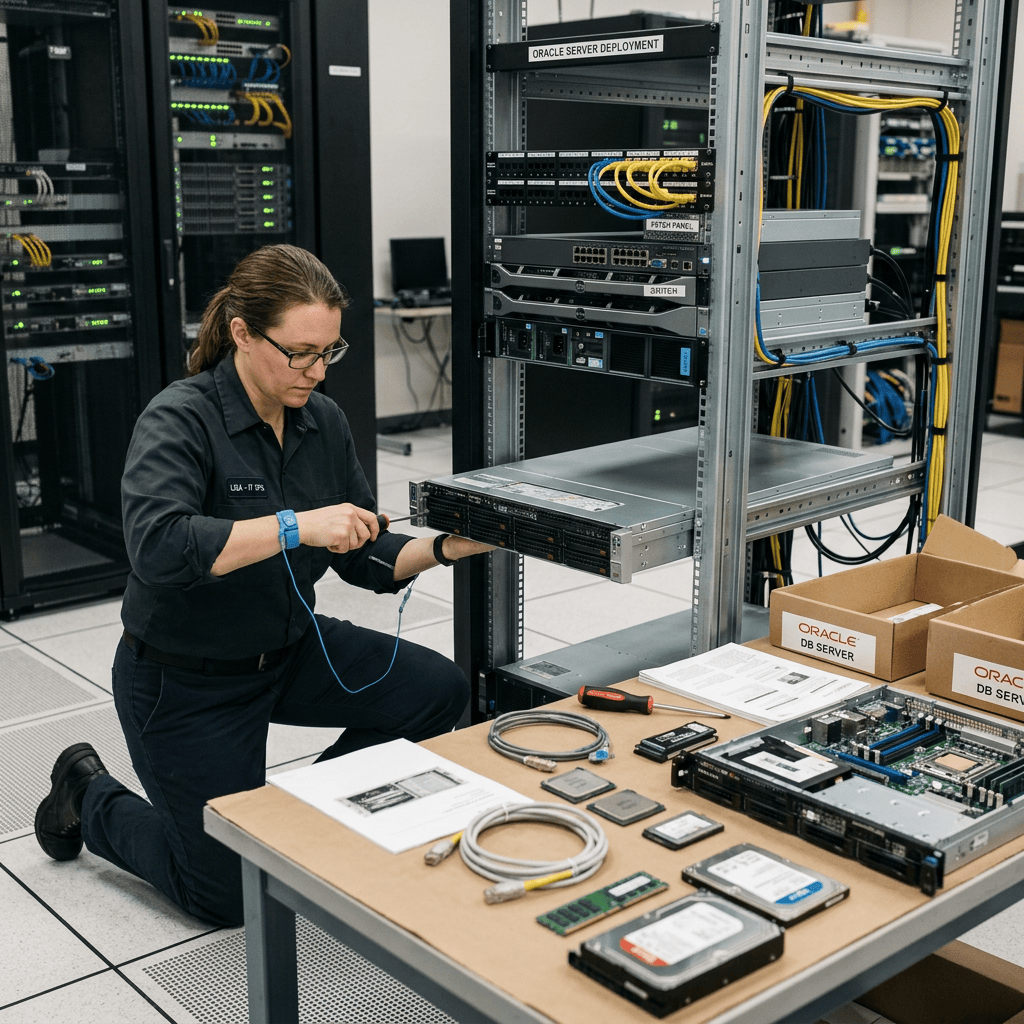
Technician servicing Oracle server rack with labeled equipment and hardware
A technician services an Oracle server rack beside components prepared for deployment.

Oracle Database 19c Release Notes Doc Bug (Jan 2024)

What DALL-E thinks “Oracle Database Release Notes Documentation Bug” looks like

Update: In Feb 2024 Oracle updated the release notes to fix most of the below! They still have the un-needed export of the CV_ASSUME_DISTID, but they did add the steps about patching with the 19.22 patch during install and updating opatch. Thanks!

In January 2024, Oracle released a new version of the Oracle 19c release notes. They also released the 19.22 patchset for Oracle Database. The great news is that with the 19.22 release, Oracle has finally got the Oracle Database on-premises install on Oracle Linux 9 stuff knocked out. It works ‘out of the box’ now. However, if you look at the release notes and navigate to the section entitled “Known Issues and Bugs for Oracle Linux 9 and Red Hat Enterprise Linux 9“, and then navigate to the 19.22 subsection, you’ll see this:

And, well… It’s not really that simple. If you didn’t have 35 years of experience reading Oracle release notes, you might take that statement at face value. Things won’t go well for you if you did. Instead, you have to peer up at the 19.21 section to see the following steps (but of course you are installing 19.22, not 19.21, so you don’t need to pay attention to that section, right?):

Single-instance Oracle Database (19.21):

  1. Set the environment variable CV_ASSUME_DISTID to OL8 ($export CV_ASSUME_DISTID=OL8).
  2. Unzip the 19.3.0.0.0 Oracle Database gold image.
  3. Copy the OPatch utility version 12.2.0.1.40 or later from My Oracle Support patch 6880880 by selecting the 19.0.0.0.0 release.
  4. Install Single-instance Oracle Database with $ 19.3 on-prem_db_ image/runInstaller -applyRU <19.21 DBRU Patch 35643107 location> -applyOneOffs <19.21 MLR 35954820,19.21 OCWMLR patch 36022515 location>

That’s quite a bit different than the 19.22 section that says “No additional patches are required for installing Oracle Database 19c Release 19.22 on Oracle Linux 9 or Red Hat Enterprise Linux 9“.

Having just done a lot of testing of this on Oracle Linux 9, here’s what (in my opinion) the release notes should actually say in the Single-instance Oracle Database (19.22) section:

Single-instance Oracle Database (19.22):

  1. Unzip the 19.3.0.0.0 Oracle Database gold image to your ORACLE_HOME location (for example /u01/app/oracle/product/19.0.0.0/dbhome_1).
  2. Download the OPatch utility version 12.2.0.1.40 or later from My Oracle Support patch 6880880 by selecting the 19.0.0.0.0 release.
    $ cd /u01/app/oracle/product/19.0.0.0/dbhome_1
    $ rm -rf OPatch
    $ unzip -q /usr/local/src/oracle/patch_downloads/p6880880_122010_Linux-x86-64.zip
  3. Install Single-instance Oracle Database with
    $ /u01/app/oracle/product/19.0.0.0/dbhome_1/runInstaller -applyRU <19.22 DBRU Patch 35943157 location> -applyOneOffs <19.22 OCW Patch 35967489,19.22 OJVM Patch 35926646 location>

Some things to note:

  • With 19.22 you don’t need to modify the $ORACLE_HOME/cv/admin/cvu_config file or export the CV_ASSUME_DISTID environment variable to get the install to work correctly.
  • Even though you can now select the 19.0.0.0.0 “Release” of OPatch, you’ll actually get a version that is 12.X (see image below).
  • The OJVM patch is optional, but I like to see my opatch lspatches command look very clean (see below).
$ opatch lspatches

35926646;OJVM RELEASE UPDATE: 19.22.0.0.240116 (35926646)
35967489;OCW RELEASE UPDATE 19.22.0.0.0 (35967489)
35943157;Database Release Update : 19.22.0.0.240116 (35943157)

I’ve asked Oracle Support to log a doc bug against the release notes, once I get the bug number I’ll update this post with it.

Good luck with your 19.22 on Oracle Linux 9 installs!


APEX & ORDS for DBAs and System Admins is now live on YouTube

I’ve mentioned this presentation before on my blog and now I’ve recorded the entire thing including the bonus content. At the various user groups like RMOUG and Kscope, I was only given an hour and just told folks to “Read the rest of the presentation.” The media team at Insum (thanks Marc and Lauren!) and I bounced back and forth on doing multiple 1-hour events or jamming everything into a single presentation. Eventually, we decided to get it done in one go. It’s long… 2 hours and 6 minutes long. Apparently, I was enjoying myself so much that I didn’t even realize that, and if you do watch until the end you’ll notice that I thought it was actually 1 hour long, not 2.

I’m pretty pleased with the presentation and I’ve got a lot of good feedback from folks. If you want to use APEX and/or ORDS and your DBAs and/or System Admins don’t want to implement it, this presentation is my gift to you. Any DBA or System Admin should be able to learn exactly what they need to know to run APEX and ORDS in a production-ready configuration.

I’ve linked to this before and the link is in the description on YouTube, but here’s another direct link to all the code on every slide: https://github.com/RichardSoule/APEXandORDSforDBASandSysadmins


Why haven’t you moved to AL32UTF8 yet?

Hey DBAs! Run this query on your database:

select value as character_set
  from nls_database_parameters
 where parameter = 'NLS_CHARACTERSET';

CHARACTER_SET
________________
AL32UTF8

If you see anything other than AL32UTF8 as the answer to the above query, then you should be building a plan to get from whatever character set your database is currently running to Unicode (AL32UTF8). While this can seem daunting, Oracle actually provides a great tool to assist with the process called the Oracle Database Migration Assistant for Unicode (DMU).

DMU will show you if your database will have any issues when you migrate from your legacy character set to Unicode. As you can see from the splash screen above “Oracle recommends using Unicode as the database character set for maximum compatibility and extensibility“. Oracle strongly suggests that all new databases should be created using AL32UTF8 and that legacy databases created in the past should be migrated to AL32UTF8.

A great time to think about a character set upgrade is during a database upgrade. If you are planning on a 19c upgrade (and we should really be there already today, but, of course, “should” and “are” are two different words for a reason) or potentially even 23c when Oracle releases it soon, and your current character set isn’t AL32UTF8 then now is the time to plan the migration!

Here’s a real-life DMU story:

A customer of mine had a database that had been created on Solaris in the late ’80s and they had used whatever the default character set was at the time, which is really what everyone was doing back then. In 2013 we decided to upgrade the database to 12.1 and change the character set during the upgrade. The fear was that this was going to be a big problem and we came up with all kinds of plans on how to fix the various issues (data cleansing, adjusting column widths on tables, etc.) However, after talking about all the potential issues, we actually ran the DMU and it showed us that the problem was much smaller than we thought. We only had about 30 rows of data that could have an issue during the migration!

After checking with the business, we just went into the 30 rows and cleaned up the data. A few “do not”s got changed to “don’t”, saving a single character which was all we needed.

Today, I talk to folks about using DMU to check their databases before they decide that “the problem is too big”. DMU will sometimes show that the problem either doesn’t exist, or it’s very small.

As an aside:

Today I did an install of DMU on a server using the download of DMU from Oracle Support. After extracting the zip file on my Oracle Linux box into /opt/oracle/dmu, I noticed that the dmu.sh script was read-only. A simple chmod u+x on the dmu.sh script enabled me to start it up without any issues.

[oracle@databaseserver DB:dbacon /opt/oracle/dmu]
$ ./dmu.sh
-bash: ./dmu.sh: Permission denied

[oracle@databaseserver DB:dbacon /opt/oracle/dmu]
$ chmod u+x dmu.sh

[oracle@databaseserver DB:dbacon /opt/oracle/dmu]
$ ./dmu.sh

   Database Migration Assistant for Unicode
 Copyright (c) 2011, 2019, Oracle and/or its affiliates. All rights reserved.

Directly Upload Files to Oracle Support

After watching a client move a file from their Linux database server down to their Windows box and then use their browser to upload the file to Oracle Support, I remembered that there was a more efficient way to do this. I was confident that I had this post in my blog already, but lo and behold, I hadn’t.

So today I fix that:

Let’s say you have an SR number 3-111222333444 and you need to upload a big zip file name zipfile.zip and you use email@blah.com to log into Oracle Support. The below command will get the file directly from your Linux box to Oracle Support.


curl -T "zipfile.zip" -u "email@blah.com" https://transport.oracle.com/upload/issue/3-111222333444/

Happy Linuxing!

Photo by Wesley Tingey on Unsplash


My Oracle Database Server PS1 Environment Variable

Today I was doing some tricky remote troubleshooting of an ORDS deployment. It turned out that it was the networking team doing fun stuff with the removal of cookies from only one of the multiple load-balanced devices between the users and the ORDS server (99% sure of this, we’ll see later if I was right). Since this stuff can be almost impossible to figure out without sniffing packets and/or visibility into the whole network configuration, a good trick to remember is to just deploy ORDS standalone on the desktop of the user attempting to troubleshoot things. If it works on their desktop, then it’s almost certainly the networking team doing something funny between the users and the application servers.

During the whole troubleshooting session, where the DBA was typing in all the commands as I dictated them (so much fun!), the DBA was constantly typing pwd. This post is for that DBA.

I’ve added the following line to my .bash_profile on all my Oracle database servers:

export PS1='\n[\u@\h DB:$( echo $ORACLE_SID ) \t \w]\n\$ '

PS1 is the environment variable that controls what your prompt looks like.

Mine has the following:

\n = a new line. This means that all of my commands have some nice whitespace (although I use green on black, so is that blackspace?) between them.

[ = the starting bracket for my prompt.

\u@\h = username@hostname

DB:$( echo $ORACLE_SID ) = Each time a new prompt is generated, find the value of the $ORACLE_HOME environment variable and display it with a DB: in front of it. It took me a bit to figure out how to get this to evaluate every time a new prompt was drawn. For my middleware servers, I leave this portion off. I suppose if your middleware server talks to only a single database, you could just hardcode it into the prompt.

\t = the current time

\w = the current working directory. No more typing pwd every other command!

] = the ending bracket for my prompt.

\n = another new line. This allows your actual command prompt to always start on the left side of the screen instead of constantly moving across the screen as you navigate down directory paths.

\$ = print the normal prompt. Notice that there is a space before the closing ‘ so that commands are not jammed up against the prompt.

Hopefully, an Oracle DBA or two out there finds this useful!

Happy DBAing!

#joelkallmanday


Windows WSL can be Oracle Linux!

The other day I struggled a bit as I was trying to get something to work on the out-of-the-box Windows Subsystem for Linux that ships as Ubuntu. Linux is Linux, but Ubuntu is just a bit different from Oracle Linux (basically RHEL with some better stuff) that I use daily.

Haniel (@haniel211 on Twitter, give him a follow) was giving me a hand and he mentioned that the MS store that has an Oracle Linux WSL application!

Since I didn’t have anything really configured in my current WSL, I just removed the Unbuntu Linux and installed Oracle Linux. It’s pretty awesome to have my WSL match the distribution that I use every day.

Happy Linuxing!


Solved (?) SQL Developer 19.2: No more authentication methods available when using SSH Connections

When Oracle upgraded SQL Developer from 19.1 to 19.2 they updated some libraries. One of those updates meant that SSH keypairs that had been generated by PuttyGen didn’t work anymore and you should “Generate OpenSSH format ppk” (see Oracle Support Doc ID: 2575854.1)

However, when attempting to do so using PuttyGen it didn’t seem to work. Taking a step back, here was the situation in 19.1 or earlier:

  1. You had SQL Developer 19.1 running on your desktop and had used the SSH Hosts dialog to create an SSH connection pointing SQL Developer at the private key on your machine (typically, this is an id_rsa file).
  2. The server you are connecting to has the associated public key (typically, id_rsa.pub) in the authorized_keys file associated with the account you were connecting to on the remote server.
  3. Everything worked as expected and you could connect to databases on the remote database server using the SSH connection.

After an upgrade to 19.2 (during which SQL Developer will ask you to import settings from a previous release), there is a chance that the private key that you previously had pointed to will no longer work.

My ‘used to work in 19.1 and earlier’ private key file looked like this:

-----BEGIN RSA PRIVATE KEY-----
Proc-Type: 4,ENCRYPTED
DEK-Info: AES-128-CBC,abcdefghijklmnopqrstuvwxyz123456
                      
abcdefghijklmnopqrstuvwxyz1234567890abcdefghijklmnopqrstuvwxyz12
[SNIP]
abcdefghijklmnopqrstuvwxyz1234567890abcdefghijklmnopqrstuvwxyz12
-----END RSA PRIVATE KEY-----

If I opened that file in Putty Key Generator on a Windows 10 box, it said that it was already an OpenSSH SSH-2 Private key.Puttygen Notice

Since Oracle Support and others said that the key needed to be in OpenSSH format, one would assume that maybe you’d use the Conversion feature of Puttygen to convert the key…

Puttygen Conversion

Nope. No go.

After playing around for a long time I discovered the OpenSSH commands that are now built into Windows 10. After testing a million things, this is what actually worked:

C:\sshkeys> ssh-keygen -e -f id_rsa > id_rsa_for_sql_developer_19.2
Enter passphrase:

Once pointed at the id_rsa_for_sql_developer_19.2 file, SQL Developer happily prompted me for my (very long) passphrase and established a connection to my database.

Great! Problem solved.

However, and this is the strange thing that I don’t really understand… If you look at the contents of the generated file, you’ll see something like this:

---- BEGIN SSH2 PUBLIC KEY ----
Comment: "2048-bit RSA, converted by rich@ROTOR from OpenSSH"
abcdefghijklmnopqrstuvwxyz1234567890abcdefghijklmnopqrstuvwxyz12
abcdefghijklmnopqrstuv
---- END SSH2 PUBLIC KEY ----

Yep, that is what it looks like, a public key in SSH2 format (although I obviously obfuscated the above, for what reason, I do not know)…

Why an SSH2 Public Key works when you should have a private key (if I understand SSH connections correctly, and this sort of makes me feel like I don’t), I have no idea. But work it did, so I happily moved on.

As an aside, I did have an SR open with Oracle on this which I ended up closing myself, but I did ask them to update Doc ID: 2575854.1 with the above information before I closed it.

Happy SQL Developer-ing!


orabasetab is wrong if you install as grid

Traditionally when you install the Oracle Grid Infrastructure for RAC, the owner of the GI software is a user named grid and the owner of the database software is a user named oracle.

With the 19c version of the GI, the software is shipped as a zip file that you extract. Unfortunately, there is a bug (if you are doing a traditional install) in this extract where the orabasetab file (located here if you are using a traditional OFA compliant install:   /u01/app/19.0.0.0/grid/install/orabasetab) has the following contents:

#orabasetab file is used to track Oracle Home associated with Oracle Base
/u01/app/19.0.0/grid:/u01/app/oracle:OraGI19Home1:N:

Which is fine if you are going to use only the oracle user as the owner of both the GI software and the database software, but if you want to install the GI software as the grid user and the database software as the oracle user then you’ll need to modify the file as so:

#orabasetab file is used to track Oracle Home associated with Oracle Base
# 2019-09-29 Rich Soule updated the original value below to the new value
# so the GI could be installed as the grid user
#/u01/app/19.0.0/grid:/u01/app/oracle:OraGI19Home1:N:
/u01/app/19.0.0/grid:/u01/app/grid:OraGI19Home1:N:

If you don’t do this then there is a real good chance you’ll see the following when you attempt your GI install: Error 49802 initializing ADR

Good luck with your RAC installs…

Rich


X11 Forwarding with MIT Magic Cookies to Oracle Cloud as multiple users

Every time I do this, I always forget the steps, especially for allowing connections after you su to another user… So, here we go:

I’m going to connect two machines: rotor (it’s a palindrome), my local Windows machine, and cloudbox, my Oracle Cloud server.

The first thing I’m going to do is connect into cloudbox as the opc user, become root and then update the sshd_config file with an X11UseLocalhost no entry. I also commented the previous value (which was already commented out) and added a comment about who changed what and when. Then I’ll restart the ssh daemon.

[opc@cloudbox ~]$ sudo -s
[root@cloudbox opc]# vim /etc/ssh/sshd_config

# 2019-08-12 Rich Soule changed below to allow remote X11 Connections
#X11UseLocalhost yes ## Original value commented out as in this line
X11UseLocalhost no

[root@cloudbox ~]# systemctl restart sshd

Next, we’ll make sure that enough of the X11 tools are on the server.

[root@cloudbox ~]# yum install xclock -y

I’m going to use MobaXterm as my client on my Windows box and open up a local terminal on rotor. MobaXterm automatically gives me an X11 Server so I don’t have to use something like Xming to give me a local X11 Server.

When I created cloudbox, my Oracle Cloud server, a private key file was created. This private key file was saved to rotor, my Windows box, in a folder on my local computer, so I’m going to cd to that folder and start an ssh connection:

[Rich.Rotor] ➤ ssh -X -i id_rsa opc@cloudbox

At this point, I have to provide the passphrase for my private key file that is in this directory. After supplying the passphrase, I’ll be connected to cloudbox.

Last login: Mon Aug 12 22:23:10 2019 from somewhere on the internet
/usr/bin/xauth:  file /home/opc/.Xauthority does not exist
[opc@cloudbox ~]$

The message above should really be something like “.Xauthority does not exist, so I’m creating it.” because that is what just happened. The DISPLAY environment variable was set to the IP address of the cloud server with a :10.0 appended to the end, and we can see what ended up in .Xauthority file by using the xauth list command:

[opc@cloudbox ~]$ echo $DISPLAY
10.10.0.2:10.0
[opc@cloudbox ~]$ xauth list
cloudbox.myreg.myvcn.oraclevcn.com:10  MIT-MAGIC-COOKIE-1  6ab3d32cf1c543ecaf83c79297ee3fbc

At this point, X11 based commands will now work, but only for the opc user.

[opc@cloudbox ~]$ xeyes&
[1] 13177

xeyes

If I become another user, then X11 commands won’t work.

[opc@cloudbox ~]$ sudo su - oracle
Last login: Mon Aug 12 22:35:15 GMT 2019 on pts/0
[oracle@cloudbox ~]$ xeyes&
[1] 13595
[oracle@cloudbox ~]$ Error: Can't open display:

[1]+ Exit 1 xeyes
[oracle@cloudbox ~]$

Looking above, it appears that the DISPLAY environment variable for the oracle user has yet to be set. The blank line after the message essentially tells us it has a NULL value. However, even if we set it, it still doesn’t work yet.

[oracle@cloudbox ~]$ export DISPLAY=10.10.0.2:10.0
[oracle@cloudbox ~]$ xeyes&
[1] 14213
[oracle@cloudbox ~]$ X11 connection rejected because of wrong authentication
Error: Can't open display: 10.10.0.2:10.0

[1]+  Exit 1                  xeyes
[oracle@cloudbox ~]$

The trick at this point is to pass along the MIT Magic Cookie that got generated for the opc user to the oracle user. The easiest way to do this is to just copy and paste the full output from the xauth list command as the opc user into an xauth add command as the oracle user:

[oracle@cloudbox ~]$ xauth add cloudbox.myreg.myvcn.oraclevcn.com:10 MIT-MAGIC-COOKIE-1 6ab3d32cf1c543ecaf83c79297ee3fbc
xauth: file /home/oracle/.Xauthority does not exist
[oracle@cloudbox ~]$ xeyes&
[1] 14512
[oracle@cloudbox ~]$

At this point, everything works and X11 commands will now display on my local Windows box from Oracle Cloud as the oracle user.

Happy Linuxing!