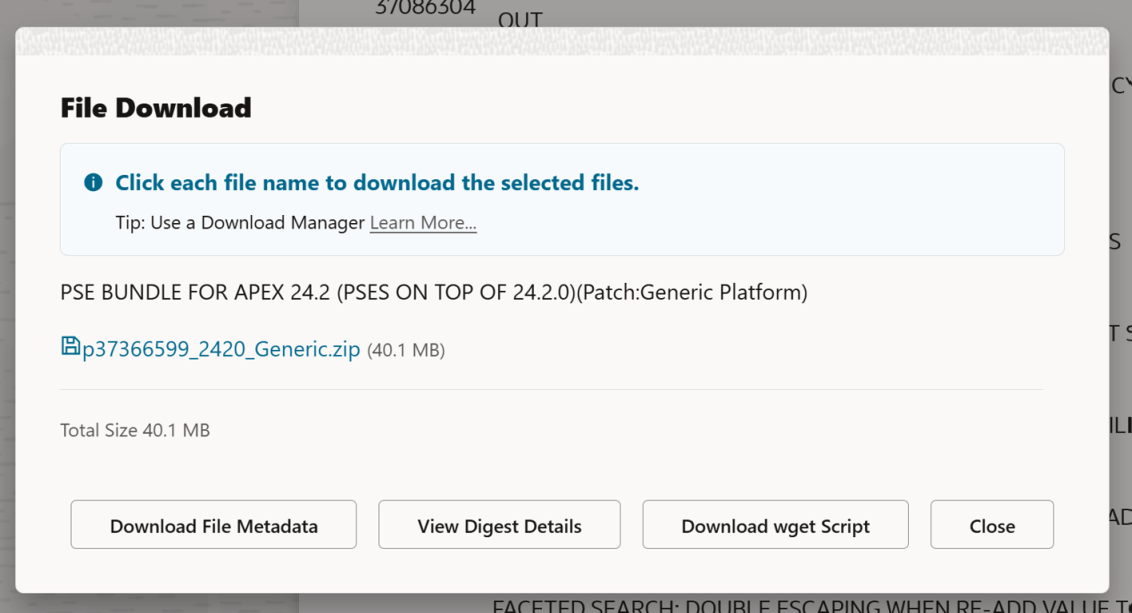
In the past, it was pretty easy to download a file from Oracle Support using the provided wget.sh script when clicking the Download button on a patch. The Download wget Script button above would have given you everything you need to download (in this case, the APEX 24.2 latest update), a patch. You’d copy that wget file to your server, run it, and your patch would magically appear on your server.
Recently, Oracle decided to require an access token in addition to the wget.sh script to download files. However, the wget.sh script doesn’t give you any indication of how to get that download token.
When you are logged into Oracle Support, you can get a ‘short lived’ download token that will make everything work. The trick is to use this URL to get it:
https://updates.oracle.com/Orion/GenToken/get_token
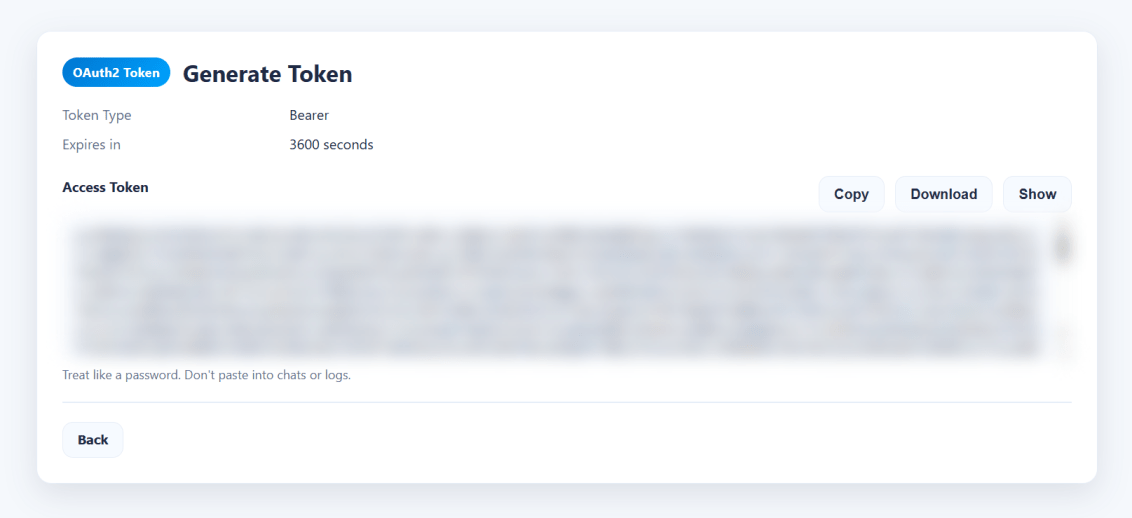
Now, on your server, you can copy the token into a token.txt file and then tell the wget.sh script where that file is using the -T argument, or you could just paste the whole key directly into the command line using the -t argument.
What you’ll see if you do it the old way
[oracle@databaseserver DB:my26con /usr/local/src/oracle/apex/24.2]$ vim wget.sh[oracle@databaseserver DB:my26con /usr/local/src/oracle/apex/24.2]$ chmod u+x wget.sh[oracle@databaseserver DB:my26con /usr/local/src/oracle/apex/24.2]$ ./wget.shINFO: Output dir not specified, defaulting to current directory.ERROR: Missing token. Provide -t <token> OR -T <token_file>.
wget.sh Help?
So, let’s see if we can get some help… Despite the ERROR: Unknown option: -help message, we do get some kind of output… But we DON’T get the necessary URL to get a token from Oracle Support.
[oracle@databaseserver DB:my26con /usr/local/src/oracle/apex/24.2]$ ./wget.sh helpINFO: Output dir not specified, defaulting to current directory.ERROR: Missing token. Provide -t <token> OR -T <token_file>.[oracle@databaseserver DB:my26con /usr/local/src/oracle/apex/24.2]$ ./wget.sh -helpERROR: Unknown option: -helpUsage: wget.sh [options]MODES (choose exactly one): Single download: -d <url> Protected download URL [-O <file>] Output filename (optional; derived from patch_file or URL basename) [-W <password>] Patch password (optional; appends &patch_password=<pwd>) Batch download: -f <file> Batch file lines: URL[,PATCH_PASSWORD] (password optional; only for password-protected patches) Output filename derived from patch_file=... (preferred) else URL basename. Lines starting with '#' are ignored. Auto-batch (no -d and no -f): Script auto-creates a batch file in output dir and uses it. Intended for Download UI placeholder replacement.MANDATORY: -t <token> Access token string (choose one of -t or -T) -T <file> Read access token from file (first non-empty, non-# line)OPTIONAL: -p <dir> Output directory (default: current directory) -P <n> Parallel downloads (default: 10 for batch, else 1) -L <file> Log file path (if set, output is written only to this file) -h HelpINTERNAL / HIDDEN: -C <file> Custom CA cert bundle path -k Disable TLS verification (insecure)AUTH BEHAVIOR:- Preflight: If the token is invalid/expired (HTTP 401/403) before starting, exit immediately.- Mid-run: If a download hits 401/403, stop scheduling NEW downloads, but allow already-running ones to finish.- End summary prints which patches succeeded/failed/skipped.ZIP VALIDATION (DEFERRED):- ZIP validation runs AFTER all downloads complete.- Before validating each file, a debug line is printed.- Uses: zip -T <file> if zip is available.- If zip is missing, validation is skipped and user must validate manually.NOTES:- Non-interactive: missing required params => exits before downloading.- Token is never echoed (unless you set DEBUG_ECHO_TOKEN=1).
Putting the token into a file
If you use the get token URL, you can just copy the contents into a file and pass it along on the command line using the capital T argument.
[oracle@databaseserver DB:my26con /usr/local/src/oracle/apex/24.2]$ vim token.txt[oracle@databaseserver DB:my26con /usr/local/src/oracle/apex/24.2]$ cat token.txt eyJ4NXQjUzI1NiI6InVMYjc0...[SNIP][oracle@databaseserver DB:my26con /usr/local/src/oracle/apex/24.2]$./wget.sh -T token.txt
Final “Issues”
For me, there was another issue (bug?) in that when I ran the above command, my terminal window suddenly just closed. When I created a new terminal shell and changed back into my download directory, the files were there. To get the output (I was curious), I redirected the output into a file like so:
[oracle@databaseserver DB:my26con /usr/local/src/oracle/apex/24.2]$ ./wget.sh -T token.txt >> output.txt[oracle@databaseserver DB:my26con /usr/local/src/oracle/apex/24.2]$ cat output.txt === OAuth start URL (manual login/token generation) ===https://updates.oracle.com/Orion/GenToken/get_token=== Starting downloads ===Mode : batch (-f or auto)Output dir : .Parallel : 10Count : 1TLS verify : enabled1 starting download for p37366599_2420_Generic.zip-> p37366599_2420_Generic.zip[p37366599_2420_Generic.zip] --2026-06-08 18:28:40-- https://updates.oracle.com/Orion/Services/download/p37366599_2420_Generic.zip?aru=28706611&patch_file=p37366599_2420_Generic.zip[p37366599_2420_Generic.zip] Resolving updates.oracle.com (updates.oracle.com)... 23.199.184.196, 2600:1404:1200:e8a::4425, 2600:1404:1200:e83::4425, ...[p37366599_2420_Generic.zip] Connecting to updates.oracle.com (updates.oracle.com)|23.199.184.196|:443... connected.[p37366599_2420_Generic.zip] HTTP request sent, awaiting response... [p37366599_2420_Generic.zip] HTTP/1.1 302 Moved Temporarily[p37366599_2420_Generic.zip] Content-Type: text/html[p37366599_2420_Generic.zip] Content-Length: 0[p37366599_2420_Generic.zip] X-Content-Type-Options: nosniff[p37366599_2420_Generic.zip] X-XSS-Protection: 1; mode=block[p37366599_2420_Generic.zip] Strict-Transport-Security: max-age=432000[p37366599_2420_Generic.zip] X-Frame-Options: sameorigin[p37366599_2420_Generic.zip] Content-Security-Policy: default-src https: data: 'unsafe-inline' 'unsafe-eval'; frame-ancestors 'self'[p37366599_2420_Generic.zip] Location: https://aru-akam.oracle.com/adcarurepos/vol/patch47/PLATFORM/Generic/R600000000217664/p37366599_2420_Generic.zip?FilePath=/adcarurepos/vol/patch47/PLATFORM/Generic/R600000000217664/p37366599_2420_Generic.zip&File=p37366599_2420_Generic.zip¶ms=c0VDZmlhSDZlVE5SNkJIVmN2VjhLdzphcnU9Mjg3MDY2MTEmZW1haWw9cmljaGFyZC5zb3VsZUBnbWFpbC5jb20mZmlsZV9pZD0xMTk4MDY0OTgmcGF0Y2hfZmlsZT1wMzczNjY1OTlfMjQyMF9HZW5lcmljLnppcCZ1c2VyaWQ9Ty1SSUNIQVJELlNPVUxFQEdNQUlMLkNPTSZzaXplPTQyMDE1NDY1JmNvbnRleHQ9QUAxMCtIQHBoeHBhYXJ1bHByZG10MDIubXRwcm9kYWVwaHgucHJvZGFwcHBoeGFldjEub3JhY2xldmNuLmNvbStQQCZkb3dubG9hZF9pZD00OTcxNzQ2MDM@&AuthParam=1780961442_2fe53a93363da4907d4609ca36ef4487[p37366599_2420_Generic.zip] Cache-Control: max-age=3600[p37366599_2420_Generic.zip] Expires: Tue, 09 Jun 2026 00:28:42 GMT[p37366599_2420_Generic.zip] Date: Mon, 08 Jun 2026 23:28:42 GMT[p37366599_2420_Generic.zip] Connection: keep-alive[p37366599_2420_Generic.zip] Set-Cookie: ARU_LANG=US; domain=updates.oracle.com; path=/; expires=Thu, 05 Jun 2036 23:28:40 GMT[p37366599_2420_Generic.zip] Set-Cookie: Oracle_updates_auth=NzkzNTk4NjQ4MGI3ZmZjMjVhOWEyMmUxY2U4YmJmMjUtNTM2MTZjNzQ2NTY0NWY1ZmU4OTExZWYyOTZiZjI1MzYwZGM5YjkwMDY4ZjZhMzk0MTA4ZjBkMGE3NmM3NWQwNzE0ZjgxNTBhMDc2ZjZlOTI5NTVjNmNmNzZkYTk4NWYxMTFmYTc4NjU1OGFlZDQwZGU1ZDI4NzJkNDAyYmMyZDVhMTU2ZjU1ZTEwNjM3ZmIyMmNlMjdlNzM3MjBlNzJhZGMyYjhkMmNkMDliMzJlNWU; domain=updates.oracle.com; path=/; expires=Tue, 09 Jun 2026 11:28:42 GMT[p37366599_2420_Generic.zip] Set-Cookie: X-Oracle-BMC-LBS-Route=4318f3ca3592793473f65c871badd0ccbf53ad372ebd5c754f16f4c54ec7cf3a79b8d7e82d899bde; domain=updates.oracle.com; path=/; expires=Thu, 05 Jun 2036 23:28:40 GMT[p37366599_2420_Generic.zip] Set-Cookie: X-Oracle-BMC-LBS-Route=4318f3ca3592793473f65c871badd0ccbf53ad3727d543e6b7f283220e2573bdc773da0f4d701470; domain=updates.oracle.com; path=/; expires=Tue, 09 Jun 2026 11:28:42 GMT[p37366599_2420_Generic.zip] Akamai-GRN: 0.8af92917.1780961320.55c1232d[p37366599_2420_Generic.zip] Location: https://aru-akam.oracle.com/adcarurepos/vol/patch47/PLATFORM/Generic/R600000000217664/p37366599_2420_Generic.zip?FilePath=/adcarurepos/vol/patch47/PLATFORM/Generic/R600000000217664/p37366599_2420_Generic.zip&File=p37366599_2420_Generic.zip¶ms=c0VDZmlhSDZlVE5SNkJIVmN2VjhLdzphcnU9Mjg3MDY2MTEmZW1haWw9cmljaGFyZC5zb3VsZUBnbWFpbC5jb20mZmlsZV9pZD0xMTk4MDY0OTgmcGF0Y2hfZmlsZT1wMzczNjY1OTlfMjQyMF9HZW5lcmljLnppcCZ1c2VyaWQ9Ty1SSUNIQVJELlNPVUxFQEdNQUlMLkNPTSZzaXplPTQyMDE1NDY1JmNvbnRleHQ9QUAxMCtIQHBoeHBhYXJ1bHByZG10MDIubXRwcm9kYWVwaHgucHJvZGFwcHBoeGFldjEub3JhY2xldmNuLmNvbStQQCZkb3dubG9hZF9pZD00OTcxNzQ2MDM@&AuthParam=1780961442_2fe53a93363da4907d4609ca36ef4487 [following][p37366599_2420_Generic.zip] --2026-06-08 18:28:42-- https://aru-akam.oracle.com/adcarurepos/vol/patch47/PLATFORM/Generic/R600000000217664/p37366599_2420_Generic.zip?FilePath=/adcarurepos/vol/patch47/PLATFORM/Generic/R600000000217664/p37366599_2420_Generic.zip&File=p37366599_2420_Generic.zip¶ms=c0VDZmlhSDZlVE5SNkJIVmN2VjhLdzphcnU9Mjg3MDY2MTEmZW1haWw9cmljaGFyZC5zb3VsZUBnbWFpbC5jb20mZmlsZV9pZD0xMTk4MDY0OTgmcGF0Y2hfZmlsZT1wMzczNjY1OTlfMjQyMF9HZW5lcmljLnppcCZ1c2VyaWQ9Ty1SSUNIQVJELlNPVUxFQEdNQUlMLkNPTSZzaXplPTQyMDE1NDY1JmNvbnRleHQ9QUAxMCtIQHBoeHBhYXJ1bHByZG10MDIubXRwcm9kYWVwaHgucHJvZGFwcHBoeGFldjEub3JhY2xldmNuLmNvbStQQCZkb3dubG9hZF9pZD00OTcxNzQ2MDM@&AuthParam=1780961442_2fe53a93363da4907d4609ca36ef4487[p37366599_2420_Generic.zip] Resolving aru-akam.oracle.com (aru-akam.oracle.com)... 184.29.30.115[p37366599_2420_Generic.zip] Connecting to aru-akam.oracle.com (aru-akam.oracle.com)|184.29.30.115|:443... connected.[p37366599_2420_Generic.zip] HTTP request sent, awaiting response... [p37366599_2420_Generic.zip] HTTP/1.1 200 OK[p37366599_2420_Generic.zip] Accept-Ranges: bytes[p37366599_2420_Generic.zip] Content-Type: application/zip[p37366599_2420_Generic.zip] ETag: "cb62b54e645a014b6573f97ab03daad6:1777541856.446518"[p37366599_2420_Generic.zip] Last-Modified: Thu, 30 Apr 2026 09:37:37 GMT[p37366599_2420_Generic.zip] Server: AkamaiNetStorage[p37366599_2420_Generic.zip] Content-Length: 42015465[p37366599_2420_Generic.zip] Date: Mon, 08 Jun 2026 23:28:42 GMT[p37366599_2420_Generic.zip] Connection: keep-alive[p37366599_2420_Generic.zip] Length: 42015465 (40M) [application/zip][p37366599_2420_Generic.zip] Saving to: ‘./p37366599_2420_Generic.zip’[p37366599_2420_Generic.zip] [p37366599_2420_Generic.zip] 0K ........ ........ ........ ........ 79% 42.7M 0s[p37366599_2420_Generic.zip] 32768K ........ 100% 50.1M=0.9s[p37366599_2420_Generic.zip] [p37366599_2420_Generic.zip] 2026-06-08 18:28:43 (44.0 MB/s) - ‘./p37366599_2420_Generic.zip’ saved [42015465/42015465][p37366599_2420_Generic.zip] === ZIP validation pass (post-download) ===[ZIP-VALIDATE] Preparing to validate: p37366599_2420_Generic.zip[ZIP-VALIDATE] OK: p37366599_2420_Generic.zip=== Summary ===Succeeded downloads: ✅ p37366599_2420_Generic.zipFailed downloads: (none)Skipped / Not started downloads: (none)ZIP validation: OK: ✅ p37366599_2420_Generic.zip FAILED: (none) SKIPPED: (none)Totals: downloads: succeeded=1, failed=0, skipped=0, total=1 zip-test : ok=1, failed=0, skipped=0Result: All downloads completed successfully.
Interestingly, Johannes Michler appears to have the only other post about this issue. He fixed it by making his own custom download script which you can paste the download URL into and then put your Oracle Support password into a prompt. That also works, but this is the way Oracle Support thinks you should do it.